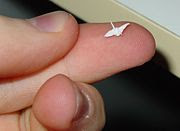
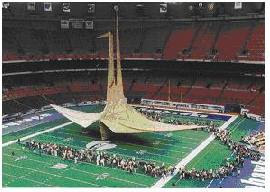
For centuries there were no written directions for folding origami objects. Directions were handed down from one generation to the next, making origami a very important part of the Japanese people’s cultural heritage. In 1797, however, How to Fold 1000 Cranes was published containing the first written set of origami instructions. The Japanese crane, a sacred bird, is one of the most famous origami designs. The origami crane has become an international symbol for peace and hope. There is a legend that says that anyone who folds one thousand paper cranes will be granted one wish. Today people still use origami objects to symbolize a cause, such as the Origami Whales Project to save the whales.
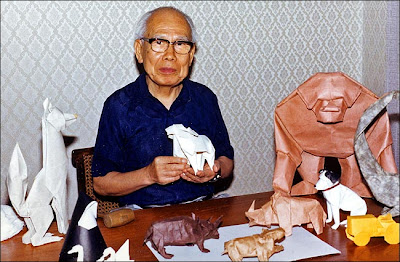
Today master paperfolders can be found all over the world, not just in Japan or China. Akira Yoshizawa of Japan is a modern paperfolding master. He has developed a set of symbols and terms that are used worldwide in the written instructions of origami. He is considered the “father of modern origami” due to his creative paperfolding.


Here are a few good Origami links:
http://library.thinkquest.org/5402/index.html
http://www.origami-usa.org/
http://origami.iap-peacetree.org/main.php?lang=1&style=1
http://en.wikipedia.org/wiki/Origami_tech_tree - Good visuals.
http://www.origamiwithrachelkatz.com/folding/symbols.htm - Good illustrated instructions.
http://www.origami-resource-center.com/edible-origami.html
Pop-Up Origami Lesson
P.A. Academic Standards:1.6 Speaking and Listening
2.9 Geometry
9.1 Production and Exhibition of Visual Arts
9.2 Historical and Cultural Contexts
9.3 Aesthetic Response
Goal:
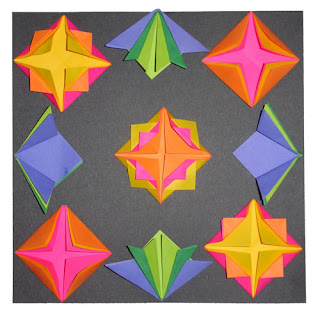
Students will learn some basic origami folds and use them to create a unique composition, using warm and cool colors and a focal point.
Objectives: Students will:
1. Understand the culture of the Japanese and origami.
2. Learn origami techniques, specifically the blintz base and the helmet base.
3. Use warm and cool colors to create a composition.
4. Learn how to find the center of the page and create a focal point.
5. Learn about symmetry and use it to create a unique composition.
6. Create a stackable origami composition.
Requirements:
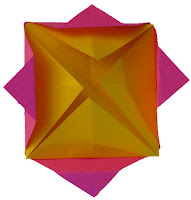
Students will create origami clusters using the blintz base and the helmet base using only warm or cool colors for each. The finished blintz and helmet bases will be stacked inside each other (respectively) and then arranged to make a unique composition including a focal point.
Resource Materials/Visual Aids:
Origami books
Origami Directions Worksheet
Origami Teaching board
• Exemplar
• Step-by-step instructions for each base
• Examples of origami, historical and current
Materials:
- 9” x 9” black paper
- 3” squares of various colors
- Glue
Teacher Preparation: Teacher will:
• Research origami.
• Create a teaching board with exemplar and instructions.
• Create a worksheet students can use a guide.
Introduction to Lesson:
Teacher will go over history of origami and origami today showing examples. Teacher will then go over how to create a blintz base and a helmet base. After the basic bases are complete, show the students how to add interest by folding certain parts. Remind the students what warm and cool colors are, and teach them about focal points.
Directions:
The Blintz Base:
1. Fold on diagonal, bringing corners together exactly. Unfold.
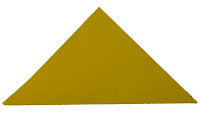
2. Fold on other diagonal, bringing corners together exactly. Unfold.

3. Fold corners into center.
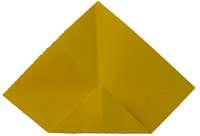
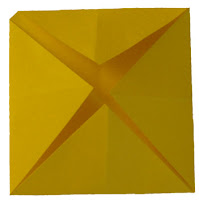
4. Stack 3 or 4 inside each other, be sure that they are all warm OR cool colors.
The Helmet Base:
5. Fold on diagonal, bringing corners together exactly.
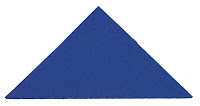
6. Fold corners to top.
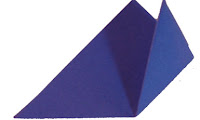
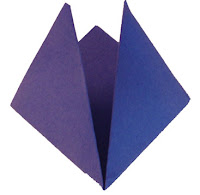
7. Stack 3 or 4 inside each other – be sure that they are all warm OR cool colors.
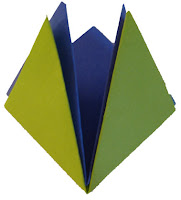
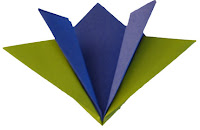
8. Add interest to your clusters by folding down certain parts and not others.
9. Make sure one of your clusters stands out as your focal point.
10. Find the middle of the 9” square and glue down your focal point cluster.
11. Arrange the rest of the clusters on the 9” square paper and glue.
Closure:
Place composition in an area to dry and clean up work area.
Critique/Evaluation/Assessment:
We will display the students’ finished compositions and discuss how each quilt is different despite everyone using the same bases.
Extensions:
Early finishers may create more clusters for another composition. Now that they know how their composition turned out they may have more ideas of how to add interest to teach cluster. The student may also look in the origami books for more ideas of bases or objects they would like to include in another composition. Students may also play with paper and paper-folding to see if they can come up their own folding designs and or bases.
Time Allotment:
Introduction: 15 minutes
Work Time: 25 minutes
Closure/Discussion: 5 minutes
Vocabulary:
Origami: The ancient Japanese art of paper folding.
Blintz Base: Preliminary Base – many origami models use this base as a starting point.
Helmet Base: Preliminary Base – many origami models use this base as a starting point.
Symmetry: Correspondence in size, shape, and relative position of parts on opposite sides of a dividing line or about a center axis.
Focal Point: The central or principle point of focus.
Composition: The plan, placement, or arrangement of the elements of art in a work.
Negative Space: The space around and between the subjects of an image.
Warm Colors: Reds, Oranges, and Yellows.
Cool Colors: Greens, Blues, and Purples.
Safety Concerns: N/A
Bibliography/References:
Pieces and creases: A fun guide to origami. (1999). ThinkQuest. Retrieved October 23,
2008, from http://library.thinkquest.org/5402/index.html.
Sturm, G. (2008) Origami for everyone. Retrieved October 23, 2008, from
http://origami.iap-peacetree.org/main.php?lang=1&style=1.
Takahama, T. (1985). The Joy of Origami. Tokyo, Japan: Shufunotomo Co., Ltd.


No comments:
Post a Comment